Nude figurative Mixed Media
Nude figurative Mixed Media
I do have a general idea of where a piece is going when I begin, but I am open to changes, my mood, seeing something different happening, opening another door. I am not stuck on an original idea, my mind is constantly going.
After a wonderful model session with a new model, I was anxious to start. I actually completed a couple pieces, but this one I decided to use as a teaching tool.
I use 100% cotton rag, 300 lb paper, hot press, water color paper, acid free. It is not slick smooth, it offers a wonderful slight tooth that will accept all my materials for a mixed media piece. I always stretch my paper and prefer stapling my paper to wood board than to use a water tape. So preparation is key to the final work, respect for your piece.
I decided on the study I would use, and drew her out several times corrected the sketch and then used a 2H pencil to transfer to my finished paper. This may be hard to see. I prefer to draw light.
Here you can see that the above shows my stapling a bit better, I also decided I would collage around part of my figure with squares of complimenting papers that I cut into 2 1/2 inch squares. I do this in quite a few of my pieces. I feel that form and shape are necessary to a good composition, also love repetition and pattern.
Moving on, I start to add my figure in a color wash. This could be done in watercolor or a diluted acrylic paint. I just want to establish a color area.
I also placed a painters tape around the edges just to keep a crisp edge of white paper when I am done. I also thought I might want a flat dark gray in the negative space, but that might change. But the figure is revealed.
I was just pleased with how the paper tapestry play is working so far. As I work on this piece and wait for areas to dry. I move to some stoneware. I drink espresso and make and sell espresso cups.
The smaller ones in the front are my SHOT Cups!!! I have a taste for Almond Tequila :) These are so much fun and they hold only an ounce, well, maybe a GOOD once! and they are stoneware and one of a kind! Fun gifts. So I am always doing. Along with these I was short on jewelry/ring dishes and made another dozen that will be fired tomorrow.
They are full of texture and can hold a lot of jewelry and put your ring on the post that I add coming slightly off center. Again, all one of a kind stone ware.
Back to the figurative piece:
I am now adding more volume to the figure with paint and pencil. Not sure of the flat gray in the negative, we will have to see :).
There are as many cool colors being used to create the flesh as there are warms. Don't just use PEACH for flesh!
My lighting really changed for this photograph. I'm beginning the face area, and just having fun. Hope you enjoy the process. I will add more soon.
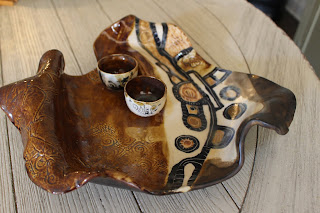
another photo of my shot cups on one of my platters. And a few other bowls!
Cappuccino cup :)
a Memory Pot
I would love just to complete the new figurative piece in the tub, but a commission piece needs to be finished. But I take a few minutes in between to evaluate how the tub piece is coming along and then do a bit of work on it.
I decided to use a technique I have used on a number of pieces in the past of creating tile like look in the negative space. Here I have applied it and must let it dry.
Next I toned the tile look to harmonize it with the existing figure in the tub, but in doing so some of the tile paper pilled a bit. (look at the upper left and corner) Easy fix, I use a fine sand paper block to smooth my area. Sand paper blocks are a staple in the studio for many looks.
I first toned the negative space with a yellow ocher /bronze mix, then lightly sanded when it was dry. With the above image, this is after the sanding and I added a very thinned teal wash over part of the negative space and the interior of the tub. I also carried collage down into the lower left, a small dish of bath items. I also washed the teal over her body. Anxious to finish this piece. Love the shadow under her right leg.
Continuing with more color to create depth throughout her torso and legs, with paint and pencil combination.
more work to finish the flesh and additional work on the lower portion of the tub.
When all my tones are set I add a wash over the entire piece with an oil mix. I etch additional line work into the painting and then rub the excess off. This is an exciting part, I never no how much of the image I will lose in the process, but it is also what gives the pieces that certain intrigue.
Now wiped clean, I determine what area I want to expose through the opening in a mat or frame. Or, what is the area I want to call my complete piece. Above you are viewing the paper. Below is where I have decided the boundaries of this piece must be.
Complete and now available.
Below are two details: Enjoy


Comments
Post a Comment